
A special thank you to my dear friend Pamela from Macdonald’s Playland! Not only is she gorgeous, but her blog is amazing and she has the sweetest personality! Today she is teaching us how to make a stop-motion video announcement!! I LOVED how she announced her pregnancy and I wasn’t the only one. In fact, so many people have asked her how she did it, so she has put together a whole “HOW-TO” for you today! Here she is:
Hello everyone! I am so happy to be here at Today’s the Best Day! (many thanks to the gorgeous Danielle for asking me to guest post today! Isn’t Danielle just one fab mommy? I love her sweet spirit and inspiring posts!) My name is Pamela, I am happily married to my Scott, and am the proud mommy to a beautiful 2-year-old named Lilly (I also have my 2nd baby, a son this time, due March 24! I am big and pregnant as I write this, so he may or may not have arrived by the time you read this post!!) I am from Los Angeles and I blog over at Macdonald’s Playland!

Since I am here on Danielle’s blog, and she is all about inspiring us in making days the best, I figured I’d share something that revolves around one of the best days in my own personal life: Finding out I was pregnant with my 2nd baby!!
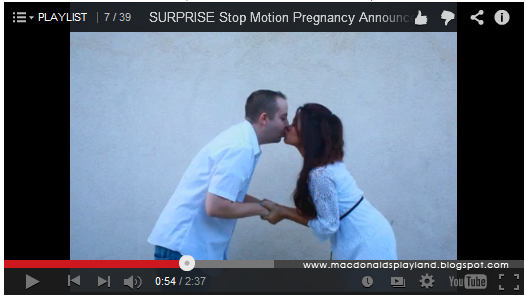
To celebrate and have fun with that special news, my husband and I did a FUN stop-motion video announcement to share our pregnancy with all our friends & family! We made the video last year, uploaded it on YouTube, shared it with everyone when I hit 13 weeks in my pregnancy, and waited for the “EEKs!” and “YAYs!”
Don’t know what I mean by stop-motion? You will after you watch the video! You can view it in my original post, or click the image below!
I’ve gotten quite a few compliments and questions on how we made this stop-motion video, so I figured I’d provide a tutorial for you all here! As you may know, stop-motion has been used for objects like clay (think of that show, Wallace & Gromit!), toys, and even for drawings. My post will be for when you want to put yourselves or other people in stop-motion magic! It is easier than you think!
-
a camera (we used our digital Canon camera) — you don’t need anything fancy! just make sure you have enough space for taking tons of photos and enough battery!
-
a patient photographer (or a tripod & a remote to help you snap photos from the tripod)
-
a video editing/making program (I used Windows Movie Maker. You can also use Apple’s iMovie, QuickTime Pro, or perhaps take a search for other free video editing programs that you can download online! There are a few programs suggested here)
-
some time and patience
-
your imagination!
INSTRUCTIONS:
2) Set up: Grab a very patient friend or your tripod! I do not own a tripod, so I ended up just using my awesome little sister help us take the photos!
Note: The final result will look a lot better if your photographer holds the camera still and stands in one place as she shoots (the camera shouldn’t be shaken around too much. My sister is not a professional photographer by any means, so it can be done by almost anyone! You just need a helpful, patient person!). A tripod is even better for this because it will ensure your camera is not shaking around as photos are being taken. If you’re a perfectionist and expect a seamless looking stop motion video in the end, then go with the tripod.
3) Create movement:
- if you are in the video, then start moving yourself bit by bit, in small movements.
- have your photographer/camera continuously snap photos as you walk or move (slowly) around the area you’re in.
- example: Let’s say you want to simply wave your hand. Put your hand up to it’s first position and stop – take the photo – move your hand slightly down to start your “wave” and stop – take photo – move your hand down more and stop – take photo – wave your hand back up slightly and stop – take photo….etc. etc. etc.
- Continue to do these slow movements alternating with snapping of photos for every person/scene you planned for your video (yes, it takes some time, but can go quickly once you get the hang of it!)
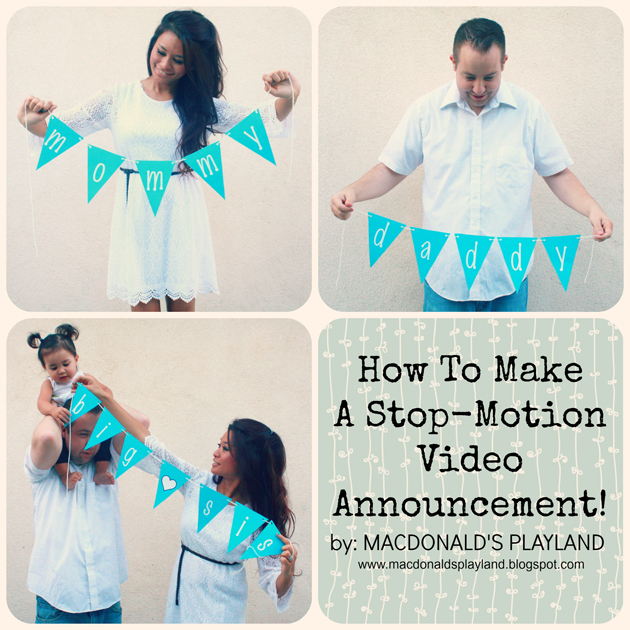
- example from my video: To help you understand this more, below is where I was writing my name out. At first glance, it looks like all the photos below are the same. However, if you look closely, you can see that I’m writing my name out slowly and a photo is being taken after each line I draw. (when these photos stream together, you’ll get the effect you want!)

4) Upload and select photos: When you’re done taking all your photos for your video, it’s time to go through all of them! Depending on how elaborate your idea is, and how long you shot for, you are mostly likely going to end up with hundreds and hundreds of photos. For our little 2.5 minute video, we literally were shooting for over an hour, and we snapped literally 300-400 or so photos!
- Upload all your photos to your computer.
- Go through them, selecting which photos are best and put them in the order they should go.
- Tip: you can create a separate folder where your “final video photos” can go, so you can easily select them and put them in their proper order. You’ll also be able to view the photos one after the other to get an idea on if you’re getting the “movement” you wanted.
5) Video editing:
- Transfer your selected photos to your video making program.
- Make sure the photos are all in the order you want them to be.
- Ensure the “time” between each photo is at a very small duration so that the photos will flow quickly when the video plays (my photos had a duration at less than 1 second)
- In most video making programs, you can preview how everything is looking and see if the “flow” of the photos is going quickly enough for your liking.
- Add music, captions, etc. for some final details to your video!
6) Go share your awesome work!!
TIPS:
- More than 1 person?:
When more than 1 person comes into the mix, the concept is still the
same. Each person should still be moving bit by bit as the camera is
firing off shots every second or so (have fun and laugh as you do the “robot” walking towards each other. Hilarious.)
- Dealing with a baby/toddler?:
Obviously, our little girl was NOT going to do any “robot” moves – so
when it comes to children with zero attention spans or who don’t understand yet, simply snap photos
as they’re moving about being themselves. You’ll still pretty much get
the same effect as long as you’re firing shots quickly!
- Be patient – this process can be time-consuming, particularly when it comes time to the photo shoot. Don’t be afraid to take breaks if need be and come back to it later!
- Don’t get discouraged – over an hour of shooting can result in a short video, depending on how many photographs are taken. As I said, I wanted to end up with a 2-3 minute video and that took us over an hour to shoot. If it’s your first stop-motion video, it’s ok if it doesn’t come out perfectly and seamlessly! Ours certainly wasn’t seamless, but it did the job and we had fun!
- Start small
– if you find yourself getting overwhelmed, start with a small idea
first (example: Try just a few shots here and there of you walking around).
Once you get the hang of it, you can try longer sequences for more elaborate videos!
- Resize photos: smaller photos will help for better uploading and faster flow in the video – larger files can slow down your work. I resized my high-resolution photos down to 600px – 900px width before placing them in the video-editing program.
- Save your work!: remember to frequently click the “save” button while you’re editing it in the movie maker program (just to be safe!)
- No tripod or friends to help? Setting the camera up on a table or even balancing books can be a sufficient alternative 😉
- Get inspired: Watch some stop-motion videos on YouTube for inspiration!
- Ask me for help: Really want to get started but still lost? Feel free to contact me to ask questions! I will do my best to help!
Stop-motion is one of the easiest ways to bring some character and uniqueness to a video.
Creating one does take some time and patience, but the way it is done is actually very simple! The best part is it can be used for anything! Pregnancy announcements, save the dates, telling a story, your own cartoon or drawings…the possibilities are endless! Be creative and most of all..have fun with it!!!
Much gratitude again to the lovely Danielle for having me here! For more ideas and other fun posts, feel free to join me in my playland! My goal is to inspire and help (even in some little way) fellow women, wives, and mommies going through their own journey…all while
documenting my own. I share my creative outlets and a smorgasbord of other topics I enjoy as I adventure through wifehood and motherhood! Enjoy your stay at my blog, even if it has nothing to do with cheeseburgers or a clown…clowns are scary anyway! 😉
leelee
March 20, 2014 at 2:19 am (10 years ago)Cutest video ever Pamela! I never saw your video so I’m glad you shared this! I always thought that picture of you and the blue bunting sign was adorable and now I know how you did it. So cute and I’ll have to try it…maybe when my oldest graduates in May… 🙁
Much love to ya!
leelee@paperbagstyling